Showing posts with label Recipe. Show all posts

Saturday, July 21, 2018

The Best Roast Beef Hash Recipe

I don't want to lose this recipe. It's very hard to find. It's so good that having it in multiple places helps me to not misplace it.

I got the recipe from the Parade section of the Sunday paper in 2007. There's no eggs over easy, no celery, no leftover gravy, precooked potatoes, no extraneous fresh herbs. What makes this delicious for me is the red and green peppers; hence, it's name Confetti Roast Beef Hash.

Sometimes I like to use a purple onion to really bump up the color.

Confetti Roast Beef Hash
2 pounds russet potatoes, peeled and cut into 1/4-inch dice
1/2 pound leftover roast beef, cut into 1/4-inch dice
1/4 pound thick-sliced bacon, cut into 1/4-inch dice
1 onion, chopped
1 each red and green bell pepper, seeded and cut into 1/4-inch dice
1/4 teaspoon nutmeg
Salt and pepper, to taste

 1. Cook the potatoes in boiling salted water until tender, 8 minutes. Drain and place in a large bowl with the beef.

 2. Cook the bacon over medium heat to render the fat, 5 minutes. Add the onion and bell peppers; cook, stirring, for 5 minutes. Remove with a slotted spoon and add to the potatoes and roast beef, along with the nutmeg, salt, and pepper. Toss.

 3. Discard all but 2 tablespoons of the fat from the skillet, then spread the hash mixture evenly in the skillet and weight it down with something heavy, like a smaller skillet. Cook over medium-high heat until golden brown on the bottom, about 5 minutes. Turn the hash over with a spatula and cook until golden brown, 5 to 7 minutes. Spoon the hash onto six plates. Serve immediately.

Thursday, December 25, 2014

Caramels, My New Love

Went to my December machine knitting meeting and Ellen gave us a cute container with caramels in it.  I had one the minute I got to my car.  It was so good and I knew my daughter would love one.  I called her to tell her I had them, so I wouldn't eat them all before I got home.  She too loved the buttery homemade taste of these caramels.  I asked Ellen if I could have the recipe and she said, "Of course."  I named the recipe after her.  I do that when someone gives me a recipe that's going to be around for a while.  That way I can think about the person who gave it to me when I make it.

 Ellen’s Caramels
1 cup butter
1 pound (2 ¼ cups) brown sugar
Dash of salt
1 cup light corn syrup
1 15-ounce can sweetened condensed milk
1 teaspoon vanilla

Melt butter in heavy 3-quart saucepan.  Add sugar, and salt; stir thoroughly.  Stir in corn syrup; mix well. Gradually add milk, stirring constantly.  Cook and stir over medium heat to firm ball stage (245 degrees), takes 20 to 25 minutes.  Remove from heat; stir in vanilla.  Pour into buttered 9x9x2 inch pan.  Cool and cut into squares.  Makes about 2 ½ pounds.

Very easy recipe.  One special piece of cooking equipment needed.  A candy thermometer.  My can of Eagle Brand Sweetened Condensed Milk was 14 oz.  Typo or did they use to be 15 oz?  14 worked fine.
In 30 minutes anyone could have 2 1/2 pounds of caramels cooling in their kitchen.  My aunt said they were commercial quality.
They were very easy to cut if I used the tip of my sharp knife and drew it straight toward side of pan.  I cut mine into 64 pieces.  I scored it evenly 8 across and cut each strip into 8 pieces.  They were delightfully too big.  It took me 3-4 bites to eat one.  I think next time I'll try 9 or 10 across.

I wrapped each piece in wax paper that I cut to fit.  Ellen wrapped hers in plastic wrap.  Both worked out well.  The caramels held their shape well in their wrappers.  I made the mistake of cutting my caramels while in the middle of a 49ers games.  I tried a bite resumed my game and when I came back an hour or so later they were spreading slowly.  Not enough to make a mess other than with my portioning.
I've gotten equally rave reviews.  Passed the recipe along.  I seldom hear of anyone using a recipe I passed along.  In this case 2 people have already made caramels.  Lucky them!


Saturday, May 31, 2014

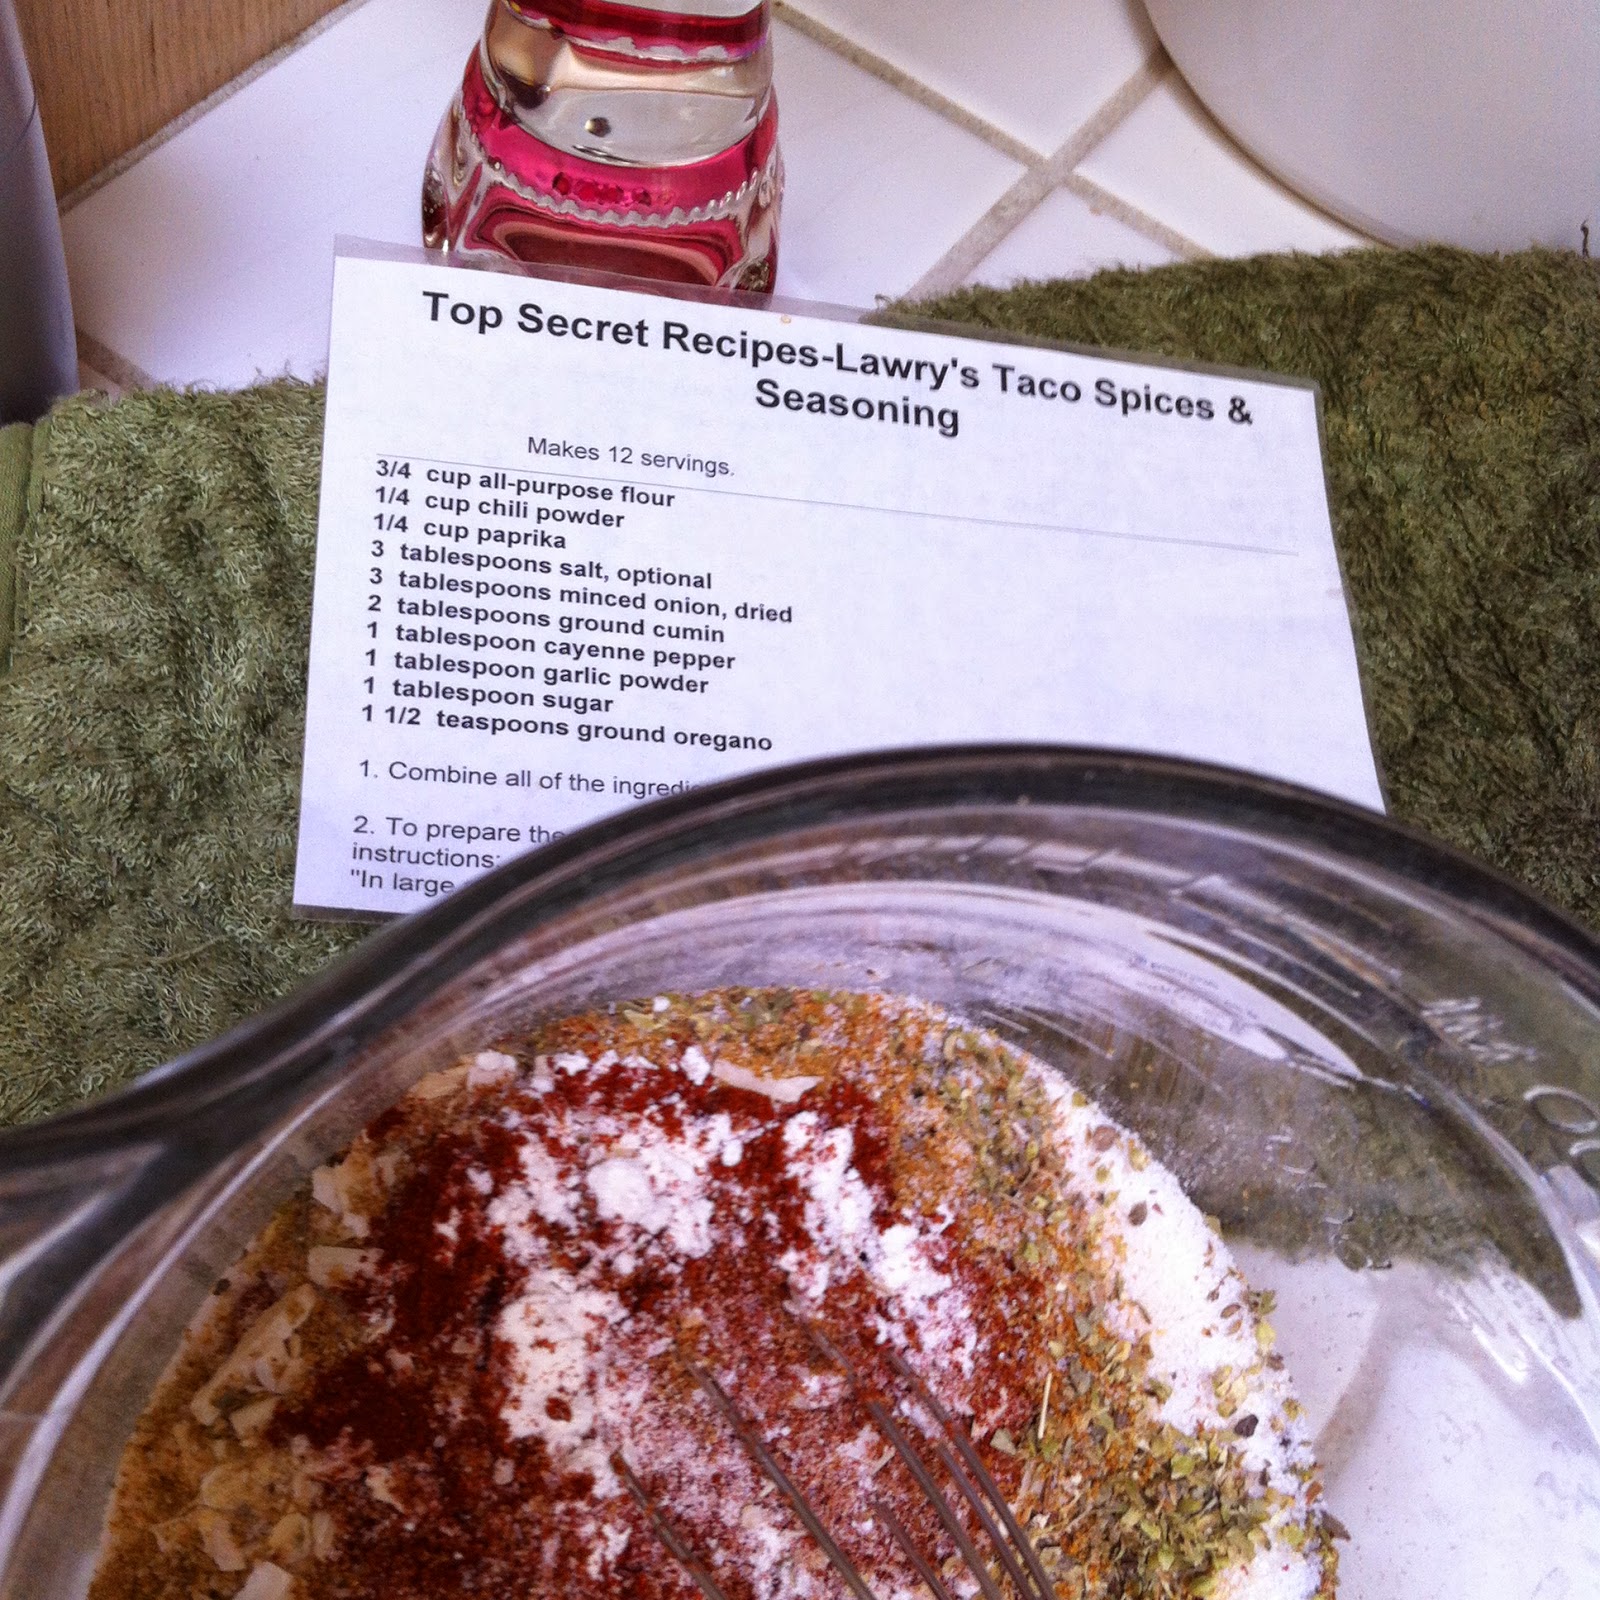
Homemade Taco Seasoning... Why?

I originally started making my own taco seasoning, because store bought was too salty for me.  I quit added salt when I was 17.  I went to live with my Grandmother while going to college and she couldn't have salt due to high blood pressure.  She was miserable and complaining about bland food quite a bit at the time.  So, I thought this is my future.  I may as well get use to no added salt now, so when I'm 60 I won't be so miserable.  Fortunately for me I grew up with very little added salt, so making the switch wasn't too hard.  Taking my added salt to nil really made store bought foods like canned soups and seasonings like taco seasoning seem overwhelmingly salty.

I tried a few recipes and found I liked this recipe and started making my own.  For some reason I really like the minced onion in this one.

In addition to less salt I found I could also control the heat of the seasoning too.  I tend to be a bit of a pansy with spicy foods.  When I make this seasoning I found out adding no salt is really terrible tasting.  It is really hard to recover from it too when seasoning the finished taco meat.  On the other hand lessening the spiciness isn't a problem.  Anyone wanting more heat just sprinkles on some Tapatio on their taco or burrito.

I like to mix up a batch and keep it in the pantry.  First time I made it many years ago I put it in a sandwich bag and stuck it in the pantry.  Next day when I opened my pantry I was slapped up side the head with a strong smell of taco seasoning and shelf liner.  One would think it was delightful.  No, it was overwhelming and not something I wanted to smell every time I entered the pantry.  I placed the bag of taco seasoning in a jar with a lid and that keeps all the wonderful smell inside the jar.  Now that I think about it why don't I just put the seasoning in a mason jar and save myself a baggie?  Proof one can learn something new every day.

So, when making this experiment with the salt and the heat.  I like to use 1 T of salt and 1 tsp of cayenne pepper for my perfect taco seasoning.  I also never have ground oregano so I rub about 1 tablespoon of the oregano leaves between my hands to break it up a little for the 1 1/2 tsp of ground oregano.

3/4 cups all purpose flour
1/4 cup chili powder
1/4 cup paprika
3 tablespoons salt, optional
3 tablespoons dried minced onions
2 tablespoons ground cumin
1 tablespoon ground cayenne pepper
1 tablespoon garlic powder
1 tablespoon sugar
1 1/2 teaspoons ground oregano

Mix together and store in a tightly cover container.  Makes about 12 servings of mix.  Add 3 T of mix to 1 pound of browned ground beef along with 3/4 cup of water.  Bring to a boil; reduce heat to low, and cook, uncovered, 7 to 10 minutes, stirring occasionally.  Use seasoned meat in tacos, burritos, nachos, taco salads.  Enjoy.

Sunday, June 9, 2013

Molasses Cookie Baskets (with a minor tweek)

In May I was asked to bring a dessert to a get together.  It was already getting hot, so I wanted to bring something that would be good, refreshing and would use seasonal fruit.  I like to treating my family to something wonderful even if it takes some time and effort to make.  BUT I like things to be easy if they can be.

I found this recipe for Molasses Cookie Baskets served with Lemon Sorbet and Blueberries with a Ginger sauce.  Not only did it sound good, but I knew it would just look impressive.  Brown little baskets filled with yellow sorbet and bright blue berries.
The instructions for making the baskets in the oven sounded a bit precarious according to the comments.  Getting them off the heated cookie sheet in one piece sounded pretty challenging.  Draping them over a cup to shape them while still hot and hoping they didn't break.  Not only would they not look impressive broken, but I wouldn't be good company if I spent an afternoon wrestling with them.  I thought why not try the recipe on my waffle cone maker.  It's pretty simple to use.  I've had great success with it. I wouldn't have to heat up the big oven on a hot day either.

The batter made as the recipe says did not work in the waffle cone maker.  It was more sugary and candy like.  Where as a cone is crispy and more cookie like.  That made me think I need to fix the batter so it more closely resembles waffle cone batter.  I got out one of my waffle cone recipes and began adding flour and egg to firm up the batter when it's baking in the waffle cone maker, yet keeping the delicious molasses, ginger and lemon flavorings.

They turned out great and were very easy to create cups.  I served mine with only blueberries as that's what's in season in May.

Molasses Cookie Baskets
(with Lemon Sorbet and Gingered Fruit )
Syrup
1 cup sugar
1 cup water
1/2 cup minced crystallized ginger

Cookies
1/2 cup unsalted butter
1/2 cup sugar
1/2 cup light unsulfured molasses
1 tsp grated lemon peel
1 tsp ground ginger
2 tsp vanilla extract
1 ¼ cup all purpose flour, sifted
1 large egg
1 large egg white

Fruit
1 pint strawberries, hulled, quartered
1 1/2-pints blueberries
2 peaches, peeled, pitted, sliced
2-4 pints purchased lemon sorbet

Syrup: Stir first 3 ingred. in small saucepan over med. heat until sugar dissolves. Increase heat and boil 3 mins. Refrigerate ginger syrup. (Syrup can be prepared 1 week ahead.)

Cookies: Bring first 5 ingred. to simmer in small saucepan over med. heat, stirring constantly. Remove from heat. Whisk in vanilla, then flour. Cool cookie mixture 10 minutes. Then whisk in eggs.

Preheat Waffle Cone Maker. Spray lightly with non-stick cooking spray. Wipe off excess. Drop mixture by level tablespoonfuls on to preheated Waffle Cone maker. (1 T for small bowls. 2 T for large bowls with ruffled edge.)
Working quickly, lift cookie from Waffle Cone maker. Drape cookie over inverted 3/4-cup custard cup. Gently shape cookie with another 3/4–cup custard cup on top; this will automatically crimp sides to form fluted cup when doing the 2T amount. Repeat baking and molding process with remaining batter. When one cookie is baking remove cookie from custard cup to cool on storing plate. 

There is another custard cup under the cookie creating the cookie shape.
To serve: Place 1 cookie on each plate. Fill each with 3 small scoops of sorbet and spoon fruit and ginger syrup over.

Bon Appétit | August 1992
Yield: 32 small baskets or 16 large baskets
And yes everyone was deliciously impressed.

Monday, January 28, 2013

Chinese Style Steamed Fish

While I was in Hong Kong there were many delicious things to eat.  Found out the Chinese food and Dim Sum served right here in my town is very close to what the real stuff is like.  What I wanted though was something I could make at home and enjoy.  We ate several meals at my SILs parents house and they were all so good.  The tools, ingredients, and recipes seemed a bit over my head.  Then one night what they called a Chinese steamed fish was served.  It was so fresh and delicious.  I thought it could really solve my issue of wanting to eat fish once a week, but not finding any recipes that made a store bought fish palatable (dang my dad for being such a good fisherman when I was a kid).
 
With my SIL translating I told my FIL that the fish was delicious and I'd like to make it when I get home.  Could he tell me how it was made?  He gave me a look "of course I will tell you, but it's really nothing special."  He went into the kitchen and brought out a bottle of Season Soy Sauce for Fish Lee Kum Kee brand.  I recognized the brand immediately as something sold here in the states.  I thought there may be some hope I can duplicate this recipe.  I found the soy sauce, but it's called Season Soy Sauce for Seafood and in parenthesis is says "very good with fish."  The FIL told me to use spring onions, Chinese parsley, and ginger.  Just steam it.
 
After I got back to the states I thought I'd look for a recipe online and found something even better Lee Kum Kee has made a video of how to make Chinese Style Steamed Fish.  The over dubbing of English is a bit silly sounding at times, but it's very helpful.  What I found out from the video is the fish is steamed right on the plate it's served on. I had no idea.
 
I went shopping for green onions, cilantro, ginger, Seasoned Soy Sauce for Seafood and a whole fish of course.  Who would have thought finding a whole fish was going to be the hard part.  I looked at the Chinese Market near me.  Nope.  I went to Whole Foods and they had sardines not what I was looking for.  I went to a fish market near me.  Nope.  Then I thought I'd try my 2 local grocery stores.  Nope.  So, I called my brother as I remembered him saying my SIL occasionally makes steamed fish.  He said his local Chinese market had whole fish.  That they even have them alive in a tank.  Talk about fresh.  Not very convenient for me to pick one up, but it is close to where my husband works for future reference.  Sunday though we were in the area and I said, "Let's pick up a fish."  They only had carp in the live tank and I'm sorry my dad conditioned me to not like carp.  They did have a nice Striped Bass on ice and I bought it.  They cleaned and scaled it for me.
 
Once home it was time to get started.  I pulled out the Farberware Wok I got as a wedding present 25 years ago and sad to say I've never used it.  I kept it all these years as I've always wanted to use it.  After cleaning it I plugged it in to make sure it worked.  It did we're in business.  I knew I could steam fish on one of my dinner plates as they are oven safe.  Next I began peeling and slicing the ginger.  I sliced green onions for under the fish and chopped some to sprinkle on top.  I then chopped up the cilantro.  I got the fish out rinse, dried it and rubbed it with salt.  I layed it on my bed of green onions.  I placed the slices of ginger on top.  The wok was set up and boiling and I set the fish inside and tried to close the lid.  My fish was a tail too long for the wok.  I didn't want to chop the tail off.  The presentation just wouldn't be what I wanted.  So, not to be detered I folded the tail up with the lid and set the lid down.  So, the tail is a little wonkie.  At least it still had the tail.  I set a time for 10 minutes.  While it was steaming I measured out my Seasoned Soy Sauce and cooking oil.
 
Once the fish was steamed my plate was filled to the brim with I guess fish broth.  I really didn't know what to do with it, so I tipped the plate over the sink and poured it off.  I didn't remember the plate being full of anything, but soy sauce, oil, green onions and cilantro in Hong Kong.  After removing ginger I sprinkled fish with sliced green onion and chopped cilantro.  I then heated the oil poured it over the fish.  I could hear the fish crackle as I did this.  I warmed the soy sauce and poured it over and it was ready to serve.  I couldn't believe that this fish looked just like what I had in Hong Kong.  As we ate it I was so pleased that it taste equally as good.
 
This morning my son said he had a dream about my steamed fish.  He said he had a whole fish to himself and ate it leaving only a plate of bones behind.  In the dream when his father asked for some steamed fish he threw the plate of bones at him.  Dreams can be so funny.

I think that it's a great compliment if people are dreaming about something you cooked.  We will definitely be doing this again and again and again.
Chinese Style Steamed Fish
 
1 1/2 - 2 pounds fresh fish
6 slices fresh ginger
3-6 stalks green onions
3 sprigs of cilantro
3 T cooking oil
6-8 T Season Soy Sauce for Seafood
 
See video for instructions on how to make you Chinese Style Steamed Fish. 

Thursday, November 15, 2012

Cinnamon Pumpkin Seed Brittle

I call the below recipe "Aunt Ruthie's Microwave Nut Brittle."  She gave me a microwave cookbook for a wedding present and she specifically pointed out this recipe as being good.  Boy, was she right.  25 years later I still make it every holiday season.
 
I started a bit early this year as I saw a possible variant that sounded so good.  The recipe had pumpkin seeds, which are my new love this year.  I put them on salads, but thought Cinnamon Pumpkin Seed Brittle sounded wonderful.  It was great!  Loved the flavor of the roasted pumpkin seeds and the cinnamon.


I decided to just add the new ingredients to my microwave nut brittle recipe since it's so easy.  To the below recipe I add 1 teaspoon of cinnamon and 1 cup of roasted unsalted pumpkin seeds as the nuts.
 
The cinnamon goes in when I add the butter, vanilla and nuts.  And of course pumpkin seeds in for the nuts.  Make sure when the cinnamon goes in you stir quickly and get the lumps of cinnamon stirred in.
 
What I found facinating (yes I'm easily entertained in the kitchen) is when roasting the pumpkin seeds at 350 degrees F they pop.  They looked like Mexican jumping beans!  The pumpkin seeds only needed 5 minutes in the oven and they are plenty roasted.  I took a pretty poor video as it had to be done through the oven window, so the heat would make them pop.  You can totally see them pop though.


So, below is the basic brittle recipe and the method I use to cook it.  Just remember to add the new ingredients for a wonderful holiday treat.
 
Microwave Nut Brittle

1/2 cup light corn syrup
1 cup white sugar
2 teaspoons butter
1 teaspoon vanilla extract
1 cup roasted nuts (peanuts, pecans, macadamia nuts are all very good)
1 teaspoon baking soda

Lightly grease a cookie sheet (or get out your Silpat). In a 2 quart ovenware with handle, combine corn syrup and sugar. Stir well. Cook on high for 4 minutes. Do not cover. (Yes, I microwave my wooden spoon. Then I don't have a sticky spoon to lay down between steps. Use a hot mitt though the spoon gets scalding hot.)

Add butter, vanilla and nuts, mixing well. Cook on high for 4 minutes.

Stir in baking soda. Quickly, (I DO MEAN FAST) pour mixture onto lightly greased cookie sheet. Allow to cool 1 hour. Breaks into bite sized pieces. Yields - 3/4 pound.

(To break up I pick it up by the edge and tap it gently on the Silpat. Break into nice size pieces.)


Wednesday, October 31, 2012

Candy Apples

(scary like hot lava... be very careful)
Dear daughter said she likes candy apples not caramel apples.  Well, I've never made candy or candied apples and thought it would be a fun project.  My dear father picked and gave me 40 pounds of apples and thought "perfect" won't have to decide what kind of apple to use.

I searched the Internet for recipes and they are all basically the same.... sugar, corn syrup, water and food color.  Some add cinnamon flavoring, but DD said no to that.  Cook with a candy thermometer to some where between 280 degrees to 310 degrees depending on the recipe you go with.  I went with the "Mom's Who Think" recipe.  They suggested clove oil and that sounded good to me, but DD said no to cinnamon I better say no to clove.  Easy recipe as I had all the ingredients and supplies at home.  No shopping to do.  Win win.

I had cookie sticks and decided to use them.  Everything from Popsicle sticks to bamboo skewers were suggested.  One thing I didn't even think of as I chose my apples for this recipe was do they stand up straight when sitting on a flat surface.  I had 3 that sat at a strange angle and one that wouldn't stand up at all unless on an angled surface.  Thank goodness for the lip of my pan as you can see the apple on the far left in the back is using it to stay upright.

One thing I noticed most pictures I saw the candied apples had bubbles.  I thought it was the bubbling candy mixture that left bubbles, but I found out that when I put an apple into the hot candy the apple exuded bubbles.  Nothing I could really do about that.  Honestly, I didn't think anyone would say, "That candied apple has bubbles I'm not eating it!"  I did find that the cooler the candy got the less bubbles, but the candy was thicker and it wouldn't swirl on a apple very well.  If I were to do this again that is something to experiment with.

Since I've made candy the recipe was pretty cut and dry.  Cook sugar, corn syrup, water, food coloring mixture until it reached 290 degrees F.  Hard crack on my candy thermometer.  I must say watching the candy bubble and boil til it reached the heat it needed I could see where the candy apple red color comes from for cars.  It's a GORGEOUS color.  After bubbling subsides swirl apples that have been placed on a stick in candy and set on a nonstick surface.  My apples were small so I got 12 covered.

They cooled quickly and DD couldn't wait to try one.  They were as I remembered hard as a rock.  My comment to DD before she bit into one was "don't break a tooth."  She tried cutting the apple into slices and eating it, but still the candy went straight to ones teeth and got stuck.  With lots of saliva and picking one could get it off, but didn't make for a very enjoyable eating experience.

Our verdict... candy apples are beautiful from a far.

Saturday, September 15, 2012

Zombie Loves Kit Kat

Busy today making some freaking cute cupcakes for my son's birthday.  I started on a Kit Kat theme 2 years ago.  Kit Kat's are my son's favorite candy.  First year I made a Kit Kat cake.  It was a big hit.  The next year I wanted to top the cake and I made a giant Kit Kat.  Again he was very impressed.  Wondering what I'd do this year I saw the cutest book at the craft store.  It is called "Zombie Cupcakes" by Zilly Rosen.  It's quite an adorable book for people who like Halloween and/or Zombies.  While thumbing through it I saw the zombie hand cupcake and knew what I'd do this year.  I'd combine my son's love of Zombies and Kit Kats.  These were very easy to make.  The supplies were easy to find at Michael's.  Then I just followed the directions in the book.  It has cupcake recipes and then decoration directions.  This cupcake was a chocolate oreo cupcake recipe with a chocolate ganache frosting.  It's going to be delicious in addition to adorable.
 
I really liked the lighting of the first picture, but it also made me see I needed to make the hand look more like it came out of the ground.
 
 With cookie crumbs around the bottom of the zombie hand I got the look I wanted.

A whole tray of zombie hand cupcakes.  They are going to be so much fun.

Wednesday, May 2, 2012

Oreo Cookies on a Stick

I saw Oreos dipped in chocolate on a stick online and thought how cute, yummy and quick would these be for a bake sale at my daughter's school.  I did a search online.  Read up on how others had made theirs and decided on a couple things.  I didn't want to open each cookie up to put the stick in as a couple sites recommended.  I definitely wanted to use popsicle sticks verses the white candy sticks.  I just loved the look of the stick.  I also loved the look of the white candy coating with sprinkles.

What I needed... 2 packs of "Double Stuf" Oreos, one pack of popsicle sticks, 2 - 12oz. bags of white candy coating (I used Guittard), and sprinkles of your choice.  This made 52 Oreo pops.  I think I had about 6 broken cookies that didn't even make it to the stick process.  DH was glad to put them out of their misery.

For each cookie I measured how far I wanted the stick to go in then I pushed it into the cookie.

I found that probably half the cookies were either already broken or I broke them pushing the stick in.  Not sure which.  Holding the cookie semi firmly with fingers and thumb of one hand as I pushed the stick in kept everything together.  I found the frosting held the cookies together nicely and that the broken cookie wasn't a factor in the finished product. 


Only one time out of 52 did a piece of the broken cookie dropped off into the chocolate. I just picked it up and stuck it back in place. No problem.


52 cookies on a stick waiting to be coated.

 After a few air pockets emerging on the sides I decided it was better to coat the center of the cookies before coating the top and the bottom.  I never dipped the cookies as I didn't think they stay on the stick and the broken cookies might fall a part.

  I used a spoon to drizzle candy coating around the center frosting section
 Then I spooned some coating on the top and using a "saucing a pizza like swirl" I spread the coating.  Flipped the cookie over and repeated.  I then gently tapped side of stick with my finger to loosen up the excess candy coating to drip back into the double boiler.  Good thing I did this as with 2 - 12oz bags of candy coating I was JUST able to coat 52 cookies.  Would not have been able to do 53.
 I put all the cookies on wax paper.  It was a little too warm in my kitchen yesterday for them to set in a timely manner. I ended up putting them in the freezer for 15 minutes.
 Since these were something quick I wanted to try for a bake sale I didn't bother standing them up to set and putting sprinkles on both sides.  For a party at my house I might do that.
 They just turned out adorable.
 They looked like something one would have to buy.
 I know they will be a hit at the bake sale.
 I could have sent them over like this, but I was feeling very crafty yesterday.
And I wrapped each one in a little bag.

Saturday, March 31, 2012

Quick and Delicious Chicken Empanadas

My daughter needed 15 culture points for Spanish and asked for ideas.  I said I had always wanted to try making empanadas.  What did she think?  She loved the idea.  I wanted to find a recipe that would be super simple as we didn't have a lot of time to really cook from scratch... after school... after track practice and before bedtime on a school night.  It had to be good though.
I found a recipe from "Semi-Homemade" Sandra Lee.  It really seemed very easy and I had all the ingredients but the pie crust.

I went one step further than Sandra Lee and I bought premade pie crusts from Pillsbury.  My folks use them at Thanksgiving for their pies and they always tastes just fine.  I didn't have time to mix and roll out pie crusts

This recipe was surprisingly SO delicious we are definitely going to make them again.  It was a great mother/daughter cooking project seeing as my daughter doesn't like to cook. 

We had an assembly line.  She worked on making the filling.  While she was doing that I cut out the pie dough.  After the filling cooled I would fill the pie dough.  It was a messy affair that took finding a technique to keep the filling in as I pressed it closed.  After wetting the edge of dough using my teaspoon cookie scoop I would plop the filling on the dough.  Then I would fold the piece in mid air with the fold facing the ground.  That way I used gravity to keep the filling in the empanada as I pinch it closed.  I would first pinch the dough closest to the fold on each side.  This made a cup like structure that made all the difference in the world in keeping the filling in.  I then gently pressed up to the top of the half circle evenly on both sides.  I handed the empanada off to my daughter who then pressed the edge with a fork and forked the top of the little pastry.  She lined them on on a cookie sheets and baked them.  Using 2 packages of Pillsbury pie crust and my 2 1/2 inch cutter I got about 64 empanadas.

They were a big hit at school.  She got 25 points for her Spanish sentences about making empanadas and the class got to eat them.

Chicken Mini Empanadas (with my tweaks)

Ingredients

  • 2 Pillsbury Pie Crusts
  • 1 11-ounce can white chicken meat, drained
  • 1 cup chunky salsa
  • 1 3-ounce can sliced ripe olives
  • 1 cup shredded Mexican cheese blend
  • All-purpose flour, for dusting

Directions

Preheat the oven to 400 degrees F. In a medium saucepan, combine the chicken, salsa and olives. Bring to a boil, then reduce the heat and simmer 5 minutes. Remove from the heat and stir in the cheese. Cool slightly.

On a lightly flour-dusted surface, unroll the dough that has been brought up to about room temperature. Using a 3-inch-round cutter (my cutter was about 2 1/2 inches), cut out 36 circles, rerolling the scraps as needed. Place about 1 teaspoon of chicken mixture in the center of each circle. Moisten the edges with water. Fold the circles in half and pinch to seal. Pierce the tops with a fork.

Place the empanadas on a baking sheet and bake 10-12 minutes, or until golden. Serve hot.
Lynne's note:  A couple of the empanadas didn't seal despite wetting the edge, pinching close and pressing edge with a fork.  It worked out OK as none of the filling came out.  We used these "ugly ones" to taste test.

Saturday, March 3, 2012

New Recipe - Sticky Biscuits

We like to make Monkey Bread every now and then around here.  It's not complicated, but it is time consuming.  When I saw this recipe for using refrigerator biscuits it reminded me of Monkey Bread.  I had to give it a try.  The only minor problem I had was I only had 1/4 cup of pancake syrup.  I had considered using some pure maple syrup from the fridge.  Maybe combining it with some Caro syrup, so the maple flavor wouldn't be so strong.  In the end I thought there was so much butter and brown sugar it would be OK only using the 1/4 of syrup I had.

 I was right it was just as sticky as anyone would want it.
I love the toasted flavor of the nuts.  Personally I don't think they should be optional.  I used only almonds today, but pecans would be really good too.

I took the liberty of changing the name of the recipe.  It was originally called "Sticky Bun Breakfast Ring."  Check out her blog called "The Jones Way."  With a recipe this yummy, she's bound to have more great things over there.

Sticky Biscuits

2 small tubes refrigerator buttermilk biscuits
OR 1 1/2 tubes Pillsbury Grands! buttermilk biscuits
3 Tbsp. butter, melted
1/2 cup pancake syrup (any brand you like
1/3 cup packed light brown sugar
1/2 tsp. cinnamon
1/4 cup chopped pecans, optional
1/4 cup chopped almonds, optional

Spray a fluted/Bundt pan with non-stick spray

Combine the melted butter and syrup in a small bowl and set aside.

In another bowl, combine the brown sugar, cinnamon, and nuts (if desired).

Place about half of the syrup mixture in the bottom of the pan. Then sprinkle half of the brown sugar mixture on top. Lay the biscuits on the bottom of the pan, overlapping edges (closely together) to form a ring. Top with remaining syrup and sugar mixtures.

Bake at 375 degrees for approximately 20-25 minutes or until golden brown.

Cool for 1 minute in the pan, then invert onto a serving platter and enjoy.

** I ended up using 1 1/2 tubes of the Pillsbury Grands! refrigerator buttermilk biscuits (1 tube didn't seem like enough) and baked it for about 30-40 minutes.

So simple.


So delicious!

Friday, January 27, 2012

Mini Chocolate Donuts

Invited a friend over early Sunday.  She asked, "Will there be coffee?"  I said, "Of course."  Then I got to thinking wouldn't mini donuts be fun.  Ever since I bought my pan from a yard sale a few months ago I've been having fun with it.  This time I made chocolate donuts.  These were made from a mix I got from King Arthur Flour.  I was already placing an order for some bread making items and thought I'd try the mix for fun.  It was VERY good.  Don't know that I'd spend the money to order it again when I can whip up a batch myself using this recipe.


Chocolate Mini Donuts
1 ½ cups all-purpose flour
1/3 cup unsweetened baking cocoa
1 tsp baking powder
1/8 tsp salt
2 eggs
2/3 cup sugar
1 tsp vanilla
½ cup milk
2 T butter, melted
Preheat oven to 325˚F.
Combine flour, cocoa, baking powder and salt.  In separate bowl mix eggs, sugar and vanilla until thick. 

Combine milk and butter.  Alternately combine egg mixture with flour mixture and mix until smooth and soft.
Spray pan lightly with cooking oil.  Fill with batter 2/3 full.  Bake 8 minutes.  Cool.  Carefully remove.  Repeat with rest of batter. 

What made these donuts extra delicious was the glaze.  Not your typical powdered sugar and water coating, but a glaze made with real chocolate chips.  It really had a rich chocolate taste to go with the richness of the donuts.

Chocolate Glaze
1/2 cup (3 ounces) semisweet chocolate chips
2 tablespoons (1 ounce) butter
1 tablespoon plus 1 teaspoon light corn syrup
1/4 teaspoon vanilla extract
Melt the ingredients together over low heat or in the microwave, stirring often. Add extra corn syrup if needed to make a smooth, shiny glaze. Yield: about ½ cup glaze.


OK these were so good I probably would order the mix again all by itself!  And I think what really made them special were the Valentine's Day Sprinkles.

Wednesday, December 14, 2011

Peanut Butter Pretzel Delights

That's what I'm going to call them.  It's a twist on an old recipe.  They've been called Peanut Butter Balls in the past sans the pretzels, but these don't quite fit that shape anymore. I wanted people to know what was in them.  Not that it really matters.  Anyone seeing these dives right in not knowing anything else about them other than it's something covered in chocolate.  I got the best compliment Saturday.  A friend picked one up and I asked would you like to know what it is.  She said, "Something covered in chocolate made by you?  It's got to be great!"  Why thank you.  They are.

I got the idea to add pretzels from hungrygnomes' blog.  When I saw the circular pretzels at the grocery store I knew they'd be fun to make.


You can find the recipe for the peanut butter filling in a previous post located here.  Once the filling is made it's just a matter of shaping and dipping.

I did find these easier and a bit faster to make, because I didn't have to roll each and every ball by hand.  They went straight from the cookie scoop to the pretzel then add top pretzel and press slightly.


Once all pretzels were used up I placed sheet of Peanut Butter filled pretzels in freezer for 15 minutes.  Then I removed tray to fridge until I was ready to dip in chocolate.

This year I melted chocolate in microwave.  I usually use a double boiler.  I've been working out at the gym this past month.  It's a good tired, but I just wanted to sit down rather than stand at the stove for an hour.


Tap off a bit of the extra chocolate.


I used the bottom of the fork I was dipping with to make the design on the top.  They looked like they needed a little something.


I dipped 80 of these.  That's all I had enough unbroken pretzels for.  Not bad though since each one needed 2 pretzels.  I have enough peanut butter filling for 20 more.  I'll just make them into balls rather than buy more pretzels.

The only thing I'd do different next time is I'd use maybe half as much filling. The delicious peanut butter filling overpowers the pretzels. They are merely a crunch.  Don't get me wrong these are still delightful.

Silly video my daughter made while I was making these.