Wednesday, December 31, 2014

Caramel Sauce... I'm cheating on my caramels!

Found a new love and fun new experiment.  I saw something on pinterest that aligned with an idea my daughter had proposed to me.  Can we make a caramel sauce out of the caramel recipe?  My daughter said the caramels tasted just like the caramel sauce at our favorite ice cream parlor Leatherby's.  My first thought was why couldn't we cook the caramel recipe less.  Then I saw the Slow Cooker Caramel Sauce pin.  The recipe was very similar to the caramel recipe.  Only a couple things differed.  1/2 as much butter, white sugar and brown sugar and lemon juice.

I decided I wouldn't add the lemon juice.  The reason given on the blog entry said it was so the caramel sauce sugar wouldn't crystallize after it was done.  WELL I saw an Alton Brown show about 5 years ago on this very subject.  He was talking about the crystallization of sugar in fudge (BTW the peanut butter fudge recipe from this episode is outstanding.)  He acted out the whole science experiment explaining when fudge crystallizes and how to stop it.  His solution was to add 1 T of corn syrup to confuse the sugar molecules and stop the crystallization.  The caramel recipe calls for 1 full cup of corn syrup.  So, I think we're covered for any crystallization problems.

I decided to use all brown sugar like my caramel recipe, but I decided to use the amount of butter called for in the caramel sauce recipe.
Finding a bowl to fit in my crockpot was the most difficult part of this whole process.  I ended up using my daughter's newer model crockpot since it was bigger and could hold the right sized bowl.
I followed the directions up to mixing the ingredients and putting them into the crockpot and there is where I diverged a little.  I didn't want to mess with it.  I wanted it to cook all night while I was asleep.  8 hours.  The recipe said it HAD to be on high to properly cook.  Since I was using my daughter's newer crockpot I knew the heat was already higher on low than mine is on low (the reason I love my old crockpot.)  I figured it might do just fine on low for 8 hours.
Before cooking.
After 7 1/2 hours


I was correct.  When I took the lid off in the morning it had been 7 1/2 hours and the texture of the caramel sauce looked a little custard like.  That did scare me at first.  I plunged my wire whisk in and began stirring.  Once it was stirred well it had the proper texture of caramel sauce.  It smelled and tasted fantastic.  I teased my daughter it was all I could do not to pinch my nose and do a cannonball right into it.  It was that good.

Now that we've actually used it on ice cream our thoughts are it does need that 1/2 cup of butter.  Though delicious and we'll eat every drop (reason why I've already given 1/2 of it away) it does need a more buttery taste to meet our idea of the perfect caramel sauce.
Makes 4 cups.  I had already filled a small mason jar to give as a gift.

Apples or ice cream it really hits the spot.
I will definitely make this again with 1 cup of butter, all brown sugar, and no lemon juice.

Thursday, December 25, 2014

Caramels, My New Love

Went to my December machine knitting meeting and Ellen gave us a cute container with caramels in it.  I had one the minute I got to my car.  It was so good and I knew my daughter would love one.  I called her to tell her I had them, so I wouldn't eat them all before I got home.  She too loved the buttery homemade taste of these caramels.  I asked Ellen if I could have the recipe and she said, "Of course."  I named the recipe after her.  I do that when someone gives me a recipe that's going to be around for a while.  That way I can think about the person who gave it to me when I make it.

 Ellen’s Caramels
1 cup butter
1 pound (2 ¼ cups) brown sugar
Dash of salt
1 cup light corn syrup
1 15-ounce can sweetened condensed milk
1 teaspoon vanilla

Melt butter in heavy 3-quart saucepan.  Add sugar, and salt; stir thoroughly.  Stir in corn syrup; mix well. Gradually add milk, stirring constantly.  Cook and stir over medium heat to firm ball stage (245 degrees), takes 20 to 25 minutes.  Remove from heat; stir in vanilla.  Pour into buttered 9x9x2 inch pan.  Cool and cut into squares.  Makes about 2 ½ pounds.

Very easy recipe.  One special piece of cooking equipment needed.  A candy thermometer.  My can of Eagle Brand Sweetened Condensed Milk was 14 oz.  Typo or did they use to be 15 oz?  14 worked fine.
In 30 minutes anyone could have 2 1/2 pounds of caramels cooling in their kitchen.  My aunt said they were commercial quality.
They were very easy to cut if I used the tip of my sharp knife and drew it straight toward side of pan.  I cut mine into 64 pieces.  I scored it evenly 8 across and cut each strip into 8 pieces.  They were delightfully too big.  It took me 3-4 bites to eat one.  I think next time I'll try 9 or 10 across.

I wrapped each piece in wax paper that I cut to fit.  Ellen wrapped hers in plastic wrap.  Both worked out well.  The caramels held their shape well in their wrappers.  I made the mistake of cutting my caramels while in the middle of a 49ers games.  I tried a bite resumed my game and when I came back an hour or so later they were spreading slowly.  Not enough to make a mess other than with my portioning.
I've gotten equally rave reviews.  Passed the recipe along.  I seldom hear of anyone using a recipe I passed along.  In this case 2 people have already made caramels.  Lucky them!


Tuesday, December 9, 2014

There Are Still Cookies In My Life

Got the cookie bug this weekend.  I have a party or two to go to and thought I should get to baking.  I had spotted these snicker bites at the store.  Thought they'd be great on my Peanut Butter Blossom recipe instead of the Hershey's Kiss.  Time to experiment.
 Above cookies were straight out of the cookie scoop.  Wasn't sure I liked the au naturel look.
 So, for the next batch I rolled the cookies into ball.  Gave a smoother look to the cookie.
In the end I think I liked the craggy look of the cookie.  Bonus it's less work.  Don't need to roll every cookie ball.  I put a pinch of holiday sprinkles on each when they were melted.  I don't think I liked the strange crunch they gave the cookie.  Next time I'll leave them off.  The cookie was very good.  I liked the extra peanut taste of these cookies.  For me the PB Blossoms with the Hershey's Kiss was too much.  Too much chocolate.  Plus once the kiss firms up on top of the cookie its a pretty firm bite.  Do I put the whole cookie in my mouth?  It's kind of big.  If I bite it in two the kiss falls off the cookie.  These cookies with the Snicker bite are soft and stay intact when bitten.  Win Win for me!

Friday, November 7, 2014

Looking Back At My 246 pound Self

Why didn't I exercise?  Why did I wait til I was so old to start?  The usual reasons I'm sure.  Exercise is hard.  Extremely hard.  Muscles get sore.  Truly sore.  One gets sweaty.  Definitely sweaty.  Like they say with drug addicts and alcoholics one has to hit rock bottom before they will affect real change in their life.  I wouldn't say I had hit rock bottom, but I could see it coming.  I could almost reach out and touch it.  Using the lessons I was learning from those around me it was a matter of time before a major health problem would force me to make a change.  Right then and there I was fairly healthy.  No high blood pressure.  No diabetes.  No strokes.  Just an absent gall bladder.  I decided to exercise.

Yes it was hard.  I told myself day in and day out I just had to do it like any other chore I didn't want to do.  I didn't know why it seemed so difficult to get me to do it.  After I had lost some weight my Dr. said wow great job.  Bet you just love exercise now.  I said, "No.  I could quit today and it wouldn't bother me."

Yes, my muscles were sore.  Every week my quads and triceps seems to be so sore I could barely operate my legs and arms properly.  The first 8 months I asked a trainer weekly


when will this end?  Will this ever end?  I thought if this is what exercise means I just don't want to endure it the rest of my life.

Yes, I get sweaty.  This I just had to get use too.  I find it goes in waves.  I'm sweatier at different times of the year.  Most of the time just a regular amount of sweat.  Some times I feel like and NFL linebacker at training camp.  Soaked to the skin.  Other times I barely break a sweat.

It's been nearly 3 years since I decided to exercise and I've kept it up.  I now know I have to.   I've found exercise is not physically difficult.  It's more mentally difficult.  Getting myself to just do it.  First off I give myself no choice.  It's on the calendar.  I have my toys, ipod, heart rate monitor, Fitbit these items help to entertain my mind and get me through it.  Most of the time I'm gung-ho to get it done.  Times when I want to leave before a proper workout I make deals with myself.  I'm very competitive even with myself.  Things like "burn 500 calories and you can go home," "use this machine to the 15 minute mark and you can stop," "walk on the treadmill for 3 miles and you can call it quits."

I still get minorly sore, but rarely if ever so sore I can't operate my body properly.  My trainer will work me hard and say "You'll be sore tomorrow."  I'll see her a couple days later "Nope not sore."  I'm finally in that good of shape.  This I can endure for the rest of my life.

Sweaty, yes still a reality of being human.  I make sure to wear clothes that absorb sweat.  Some like to wear very little to stay cool.  Me, I can't stand the feeling of dripping sweat.  Of skin sticking to sweaty skin or skin sticking to a mat.  I wear a t-shirt.  It catches the drips.  I can pick up the neck of my t-shirt when needed and wipe my face.  I wear cotton capris.  Shorts just don't catch the dripping sweat the way I like.  I wear cotton underwear.  Yes, TMI, but most necessary.  I also remind myself I'm only going to be sweaty for about 90 minutes or so and a cool enjoyable shower is waiting for me at home.  I have wonderful smelling shampoo and shower gel to bring me back to feeling great.
Like hiking the coast with my honey
I've found ways to get through it.  Could I stop tomorrow and never go back?  Mentally, I'd like to.  Physically I just couldn't.  I enjoy being in shape and able to do pretty much whatever I want in life.

Monday, August 4, 2014

Crocheting My Heart Out

Finished a CBN (crochet by numbers) project.  Been working on it a lot since June.  It's a biggie. 15,688 stitches.  Mystery CAL#2 (crochet along) by Lee Mac a phenomenal CBN artist.

Totally, stole the idea of a picture of the real thing posted under the crochet item from Totallee.net.  I love the comparison.

I started this, because I thought it would be fun to reveal the mystery and as practice before I start some photo CBN projects.  I've learned a lot.

Yarn shading choices:  2 of the browns I chose are a little two close in color.  When I introduced the white (in the eyes) I changed from a bright white to a cream.  BUT when I got to the top of wolf's background (between the ears) I think it would have looked better had I used the border color.

Tying off tension:  I was tying so tightly that my knots were pulling themselves back through to the right side of project.  What I did wrong for me was I laid the project down tail side up and knot it close to stitches.  Now I lay it down tail side down.  Then I knot with a little room close to the top of the worked stitches.  This gives me some slack in my knotted tails to pull through for a nice finished look.

Pulling knots through at an appropriate time:  First I found using a crochet hook 2 sizes smaller than the one I'm using for the project made it easier for me to pull the knots through.  I used a G hook for the project and an E hook was perfect for pulling through the knots. The minute there is a row of knots on the right side pull them through.  It's easier to crochet the piece.  It's easier to pull one row of knots through when not tangled with other knots from previous rows.  It doesn't leave a lot of work for latter when pulling through many rows of knots is VERY tedious.

Don't get lazy about counting stitches:  When I got to the dark brown patch there were long stretches of one color.  So, I would just count the yarn change stitches at the beginning and at the end.  Well, some where and some how in the brown section I skipped a single crochet.  I can see it now (I don't think anyone else would notice).  I got about 14 rows away when I started counting the smaller section of brown and realized I was one stitch off.  So, being a practice piece I increased one stitch in the brown section (again I don't think anyone else will see it) and continued on.  Had this been a intricate photo piece I might have had to rip back 14 rows to keep the piece looking nice.

Don't get lazy about correcting mistakes:  Do I have adult dyslexia?  I would sometimes read the pattern Color 4 stitches 2, but when I got to my piece I'd crochet Color 2 stitches 4.  Though each row changes as you go I found I can kind of see when things aren't looking right.  Like why is this dark brown row starting right above this cream row.  Then I'll double check the pattern.  "Oh it's supposed to change here" OR "Oh no I've reversed my instructions."  So, going back one row and correcting a mistake is way better than going back 14!


With my new gained knowledge I feel fully ready to move on to anything I want to do.

I have a silly cartoon dog pattern I'm going to do next.  It was my free pattern when I signed up to learn CBN from Todd Paschall.  I have over half the colors to do the dog that's another reason I'm doing him next.  I think I really only need a dark blue, but I'll double check the list before I start.

Random addition:  Friends have seen this piece and one wants me to make her one.  I know her well enough to say, "Yah, right!"  I sat with her and discussed the amount of time I put in not counting the cost of yarn.  I figured I'd paid myself $10 an hour just to make the math easy.  I would have to sell this piece for at least $600.

Saturday, May 31, 2014

Why I Sound Like Yoda When It Comes To My Fitness

This is what I feel like I sound like when someone asks me how I lost 83 pounds.  First thing I say is you're not going to like what I have to say.  Then they immediately crinkle up their nose and say, "exercise?"  They say it with their face looking like they just ate a bad oyster.  They say it with the look of "Well that's not going to happen."  I reply, "Yep.  Exercise."  With a sad I'm so sorry to have to tell this look on my face.  Then they say, "Well, that can't be all you did.  You had to have altered your eating drastically too."  I reply, "Nope. Just exercise and a gentle tweak here and there to my diet.  I eat more.  I make sure my protein is up.  I make sure my fat grams are down.  I don't ingest any artificial sweeteners.  Yes, that includes stevia."
Personal preference on the Stevia.  This is when they argue with me about how one can lose weight without exercise and with all natural stevia.  I just smile a smile that says, "How's that been working for you?  I know it didn't work for me."  And this is when "exercise or do not exercise it's your choice to make" comes out of me.  This is when I feel like I sound like Yoda's famous quote, "Do or do not... there is no try."

I know where they are coming from.  No one... NO ONE didn't want to exercise more than me.  I did it to prove that exercise wouldn't work for me.  I wanted to knock that off my list of things I really tried when I talked to my doctor on what I could do next to lose weight.  I even hired a trainer to tell me how exercise, so I'd have a witness to "she exercised so hard and it didn't work for her."

What I found out was exercise did work.  It worked probably immediately.  The first month I lost 2 pounds without changing my eating style.  The 2nd month I lost 2 more pounds.  I did this through Thanksgiving and Christmas.  January came around and my trainer gently suggested I might want to stop drinking diet soda.  This is when the weight loss really took off.  I stopped diet soda originally just for a month.  Liked the way I felt so much I never when back.  I started adding healthy fats to my diet.  My trainer suggested I make sure I was eating enough protein and I wasn't even close to eating enough until I started watching it.  Even though I didn't add salt to my food there were things that were high in sodium.  Salad dressings high in sodium.  The Seasoned Rice Vinegar I used to replace salad dressings had a lot of sodium.  My diet has evolved a lot over the past 2 1/2 years really with just little changes.  I knew if I made big changes and big restrictions from my normal way of eating I'd never be able to stick to it.

Exercise is my baseline.  I don't ever sway from doing it.  It is what keeps my body and my eating on track.  Who wants to mess up a good workout with bad food.  I don't.  So, as Yoda so profoundly said, ""Do or do not... there is no try."  You decide for yourself how you want your future to look.  Mine looks fit and trim.

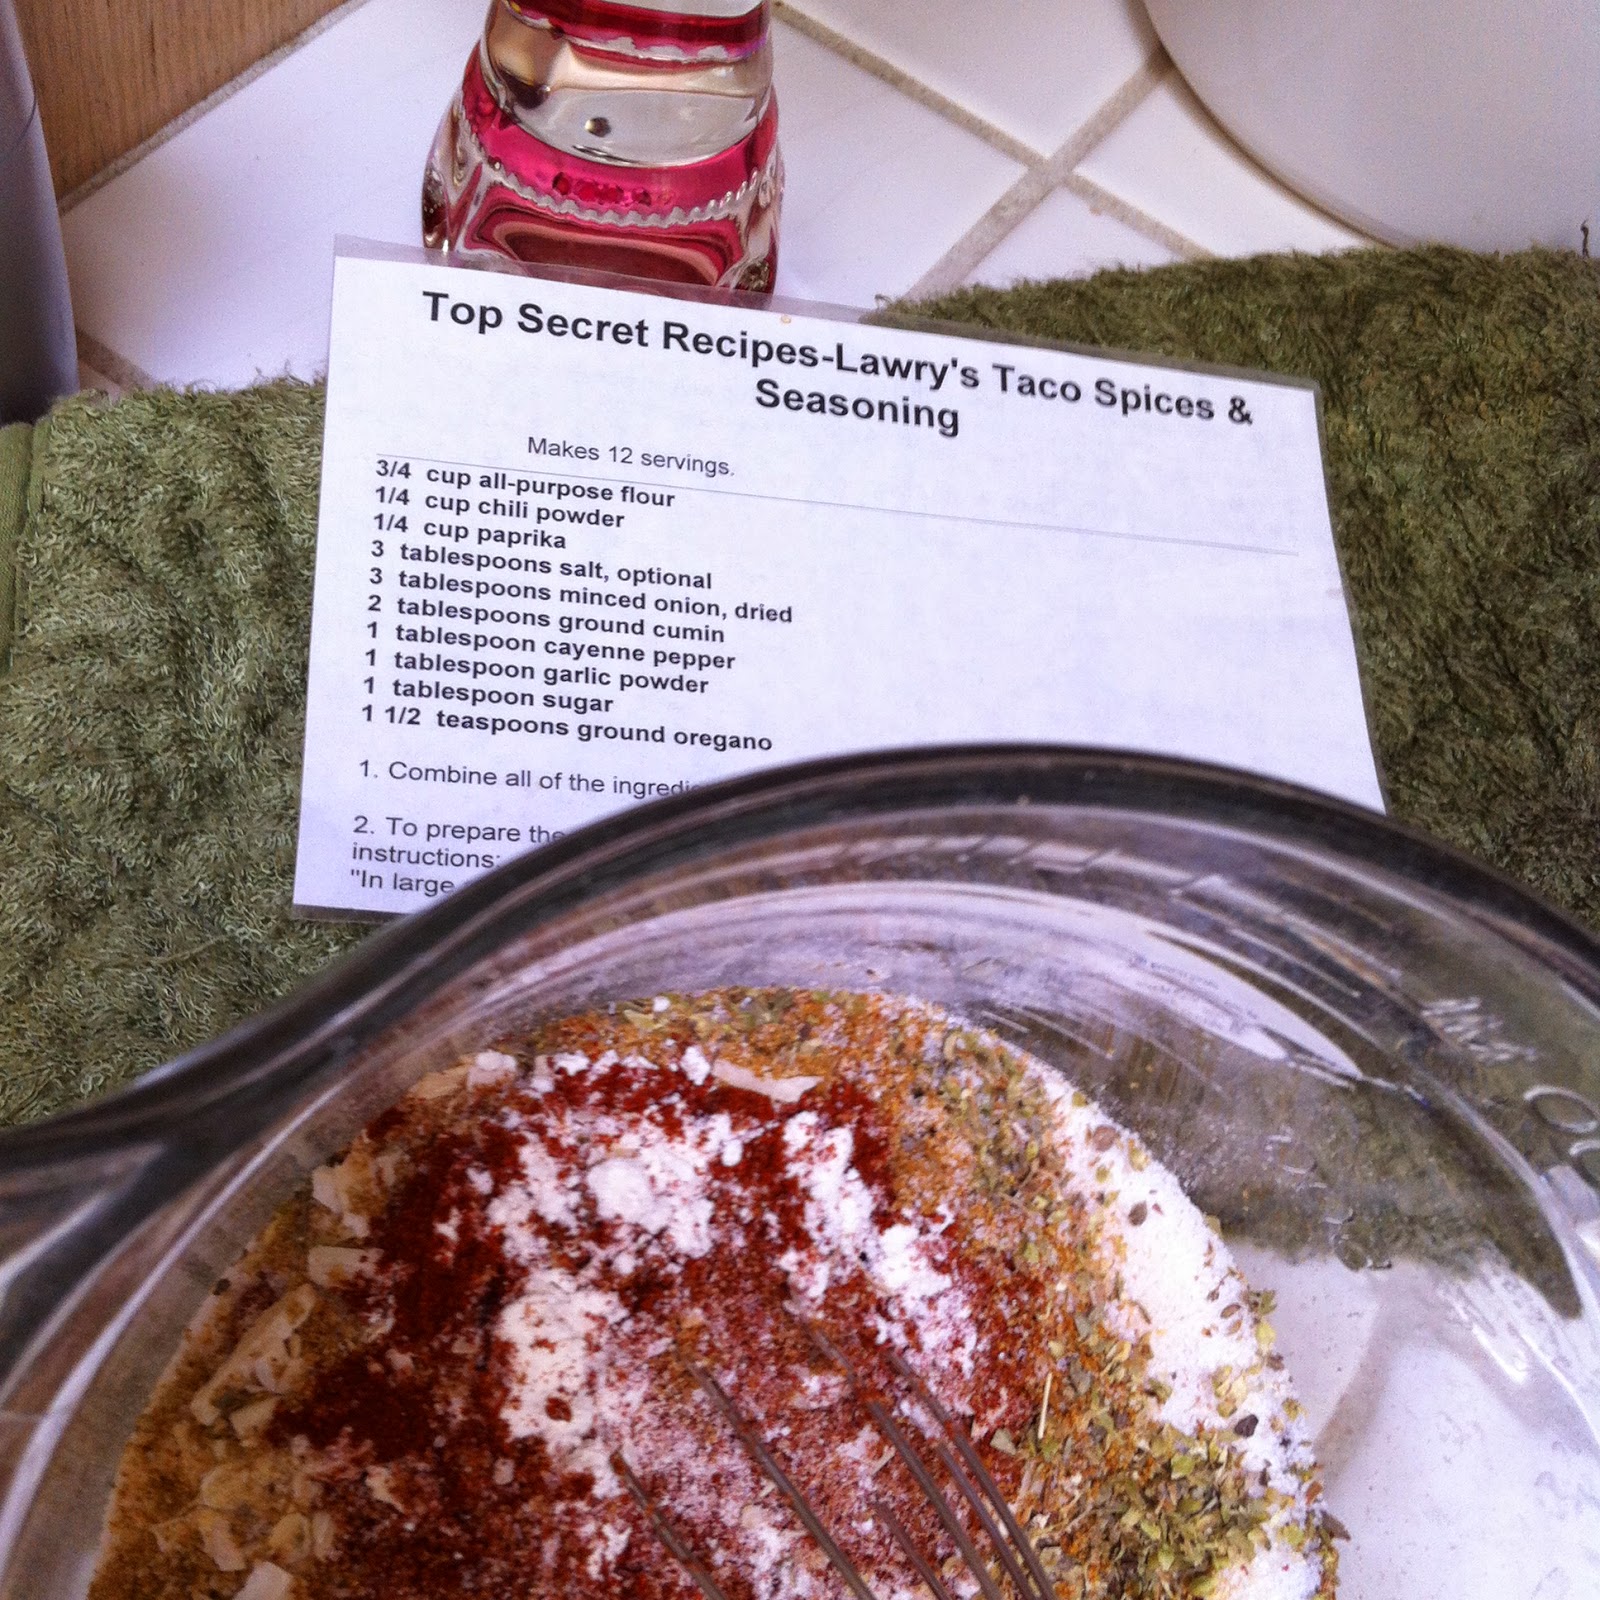
Homemade Taco Seasoning... Why?

I originally started making my own taco seasoning, because store bought was too salty for me.  I quit added salt when I was 17.  I went to live with my Grandmother while going to college and she couldn't have salt due to high blood pressure.  She was miserable and complaining about bland food quite a bit at the time.  So, I thought this is my future.  I may as well get use to no added salt now, so when I'm 60 I won't be so miserable.  Fortunately for me I grew up with very little added salt, so making the switch wasn't too hard.  Taking my added salt to nil really made store bought foods like canned soups and seasonings like taco seasoning seem overwhelmingly salty.

I tried a few recipes and found I liked this recipe and started making my own.  For some reason I really like the minced onion in this one.

In addition to less salt I found I could also control the heat of the seasoning too.  I tend to be a bit of a pansy with spicy foods.  When I make this seasoning I found out adding no salt is really terrible tasting.  It is really hard to recover from it too when seasoning the finished taco meat.  On the other hand lessening the spiciness isn't a problem.  Anyone wanting more heat just sprinkles on some Tapatio on their taco or burrito.

I like to mix up a batch and keep it in the pantry.  First time I made it many years ago I put it in a sandwich bag and stuck it in the pantry.  Next day when I opened my pantry I was slapped up side the head with a strong smell of taco seasoning and shelf liner.  One would think it was delightful.  No, it was overwhelming and not something I wanted to smell every time I entered the pantry.  I placed the bag of taco seasoning in a jar with a lid and that keeps all the wonderful smell inside the jar.  Now that I think about it why don't I just put the seasoning in a mason jar and save myself a baggie?  Proof one can learn something new every day.

So, when making this experiment with the salt and the heat.  I like to use 1 T of salt and 1 tsp of cayenne pepper for my perfect taco seasoning.  I also never have ground oregano so I rub about 1 tablespoon of the oregano leaves between my hands to break it up a little for the 1 1/2 tsp of ground oregano.

3/4 cups all purpose flour
1/4 cup chili powder
1/4 cup paprika
3 tablespoons salt, optional
3 tablespoons dried minced onions
2 tablespoons ground cumin
1 tablespoon ground cayenne pepper
1 tablespoon garlic powder
1 tablespoon sugar
1 1/2 teaspoons ground oregano

Mix together and store in a tightly cover container.  Makes about 12 servings of mix.  Add 3 T of mix to 1 pound of browned ground beef along with 3/4 cup of water.  Bring to a boil; reduce heat to low, and cook, uncovered, 7 to 10 minutes, stirring occasionally.  Use seasoned meat in tacos, burritos, nachos, taco salads.  Enjoy.

Saturday, April 5, 2014

Crochet By Numbers-My First Rogue Project

Fascinated with this crocheting technique.  It's really quite simple.  What makes it difficult is creating your own graph.  This is where the creativity comes in from the start.  At your computer.  Not only do you need to scan in what you want to do, but I feel there is some finesse to the photo.  Correcting margins, defining the background don't even get me started on combining of 2 photos.  I've seen it.

I signed up to learn the technique from Todd at Crochet by Numbers.  Busy dude I think as I found it difficult to get emails back in a timely fashion.  Ok should say in a Lynne "I'm learning a new craft" fashion.  Last summer I decided to spend 3 months doing it.  In that thought bubble above my head here's how I envisioned Todd's life (Family guy, full time job, kids, wife and takes commissions for CBN art pieces really a 2nd job.)  Here's me (why can't you put your life on hold for some old lady across the country who wants to learn CBN pronto.)  He does get back to you don't get me wrong, but I had a crochet hook and it needed work after I did the beginning work projects.

So, I cruised through the CBN posts and groups on Ravelry.  This lead me to another person doing phenomenal CBN work too.   She makes her own patterns.  I love that she's very protective of Todd and his Crochet by Numbers technique.  This I think encourages his business and encourages one to get creative and do their own work.

I saw few practice projects on Lee Mac's website and one was a British Flag.  She being Australian I can totally understand this fine project.  Me, being lazy and from the United States decided that if I was going to put all this crochet work into a project I wanted it to be something that would be personal for me.  Ever since 9/11 I've had a fascination with having United States flag represented some where in my life.  I decided to give making my own chart of my flag a try.  I could go all traditional the straight lines of the flag would lend themselves well to crocheting.  I thought if I'm truly going to get some practice with this technique I needed to mix it up.  I found a graphic of a waving flag that I liked.

Thinking it wouldn't be much more than 3 colors red, white and blue it should be pretty easy.  After fiddling with the program I got it down to 11 colors!  Oh yeah forgot about shading.  Forgot if I want this piece to look good it will need shading.

As I sat working on this project I realized I'm having a major yarn problem.  My yarn choices are not the same color name as the project sheet.  I made up a chart of the names.  Still having trouble.  Yarn skeins rolling all over I decide to put them in a box.  Now it's hard to read their names.  I put down the crochet hook and got out a sheet of blank paper, scissors, a sharpie, tape and a hole punch.  Voila!  I now have the yarn organized in a manner that me and my short term memory problems can handle.
Another vblog of Lee's that put the idea of bordering the piece as you go.  I've seen where a crocheted border is put on the piece after and I didn't like it.  Not to say it's not perfectly fine, but for my projects I liked the pieces that were bordered as you go.  I chose this gold color, because ultimately I want to turn this into a pillow for my living room.  I think the color went well with the flag and well with my living room color scheme.
When the piece is flip flopping around in my lap it doesn't look like much.  I took a photo to share with Lee and when I saw the piece I got giddy.  It really does look like a waving flag.  A simplistic waving flag, but that's what I'm going for.  I wanted a fairly easy nice looking piece to practice on.  Practice pattern making, crocheting and I think really most importantly picking out colors that go well together.
I've seen a few CBN pieces where there is one color that doesn't belong.  It pops out at you and distracts one from the beauty of the art.  Lee has even spoken about this very yarn color problem in a piece of hers.

When I chose my colors the red and white were easy.  Then I needed a blue that would fit into the family of the red and the white.  My next problem with color choices was the grays.  I needed 4 colors of gray for the shading.  I had to tear myself away from the idea that the label needs to say gray in order to get the colors I wanted.  2 of my grays are called silver heather and linen.  I squinted my eyes to just get the hue of the color in my brain and see them blending together.  I needed a shading pink.  Again don't read the label it says orange, but the color is perfect for light coral.

I just love how the piece turned out.  I got a lot of practice in pulling the knots through as I went.  Lee again had a video on where to pull the knots through.  Most helpful.  I'll be turning this into a pillow for my couch.

If you'd like to look into doing this craft check out Todd Paschall's Crochet By Numbers website.  You can also get a lot of great tips from Lee Mac's Totalee.net blog.

The Proverbial Bucket List

I don't have a bucket list.  I've thought about making one and never really know what to put on it.  I do recognize when I do something that is on my imaginary bucket list.  Then I'll say, "That was on my bucket list, check."  Last Thursday I did something that's been on my "bucket list" for probably 25 years.  First I was too scared to do it.  Then I was too out of shape to do it.  Finally, I made up my mind that I was definitely in shape to do it I just needed to grow a pair and do it.  What was it... ski an intermediate slope.  My daughter and I were just too good to keep skiing the bunny hill.  When the lift operator says, "You again, that was fast."  You know you are where you don't belong.
My daughter and I decided to take the intermediate free group lessons.  Found out the lesson groups were numbered 1-5.  I thought we had to be a 3.  The instructor quizzed us about our skills and said, "You are a number 2." What?!  Oh OK I'll take your word for it.  Found out quickly we were definitely number 2 material.  We learned so much in 2 hours.

First of all the intermediate lift is a lot faster than the beginner lift.  It was almost terrifying the speed at which it went up the hill.  It did, I found out as I got off, slows down for you to get off and then off it goes.  As I skied down and around to our meeting place I psyched myself out.  I saw how steep the hill was and started working out "plan B" in my head instead of paying attention to my skis.  Next thing I knew my tips were crossed and I'm going down.  It was a very soft lazy fall and with the assistance of a kind stranger I was up and back with my group.  My head was back in the game.
When I rented my skis that day there was blue tape on each of them with the word "Courbage" on them.  It was scratch up and first I thought they said "Garage."  As I got my instructions on how to make a proper turn and traverse the hill I looked down at my skis and to me they suddenly said "Courage!"  That lifted my spirits immensely.  It reminded me I did have the tools to ski this hill.  All I needed was practice.  I talked my way all the way down the hill.  "Shins against boots, prepare for turn, COURAGE, lean forward, look forward, COURAGE, hands out front, remember to breath, COURAGE!  It was exhausting and exhilarating.  The instructor said we were using way more muscles and effort, because we are new.  He said with practice and confidence it will get easier.

It was the end of our lessons and we had been skiing for about 3 1/2 hours.  Our plan was to only ski half a day so my daughter could get to her evening class.  I asked my daughter if she wanted to make one more run even though I was exhausted, but she had fallen once on her way down too and had twisted her knee slightly.  She said she'd rather have lunch now.  I secretly thought "THANK GOODNESS!"

Even though I was ready to get off the hill that day.  I'm very excited to start on the intermediate slope and practice my new found courage.